
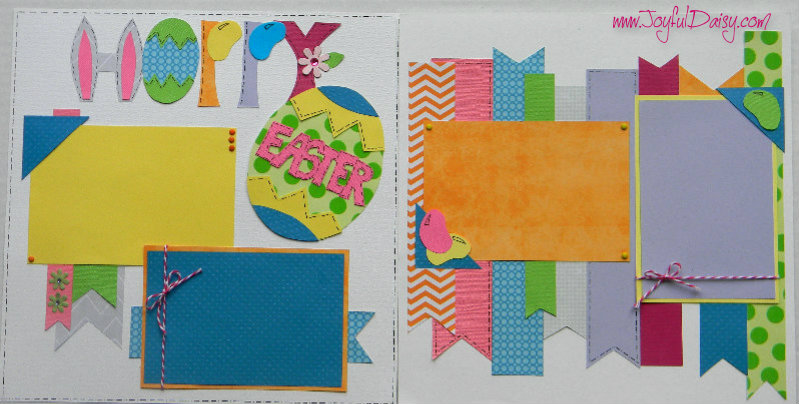
HOPPY EASTER:) I had an idea for another snowman scrapbook layout but my heart yearns for spring after this long cold winter so I changed gears and decided to have fun with lots of fun colors which led to this Easter scrapbook layout! So grab some jelly beans to snack on and lets get started, shall we…
SUPPLIES…
Grab the usual – your paper trimmer, scissors, adhesives, black pen, and lots of fun colored papers that compliment each other.
I also used some bakery twine, small fun colored brads, and a couple flowers with crystal centers to add a few different textures to the layout.
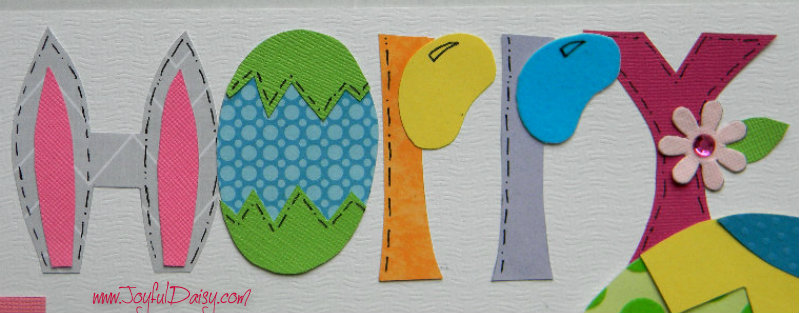
Download and print Hoppy Easter Pattern. Cut out and trace pattern pieces on desired papers. FYI, print out pattern on cardstock for easy tracing.
Download
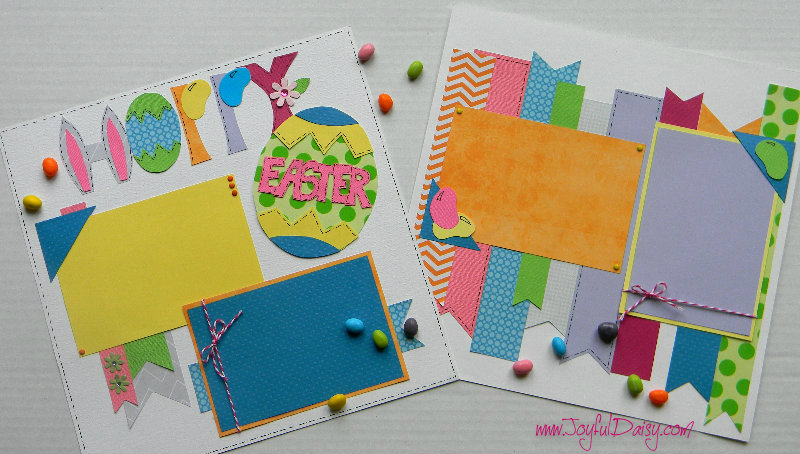
TIME FOR PAGE 1…
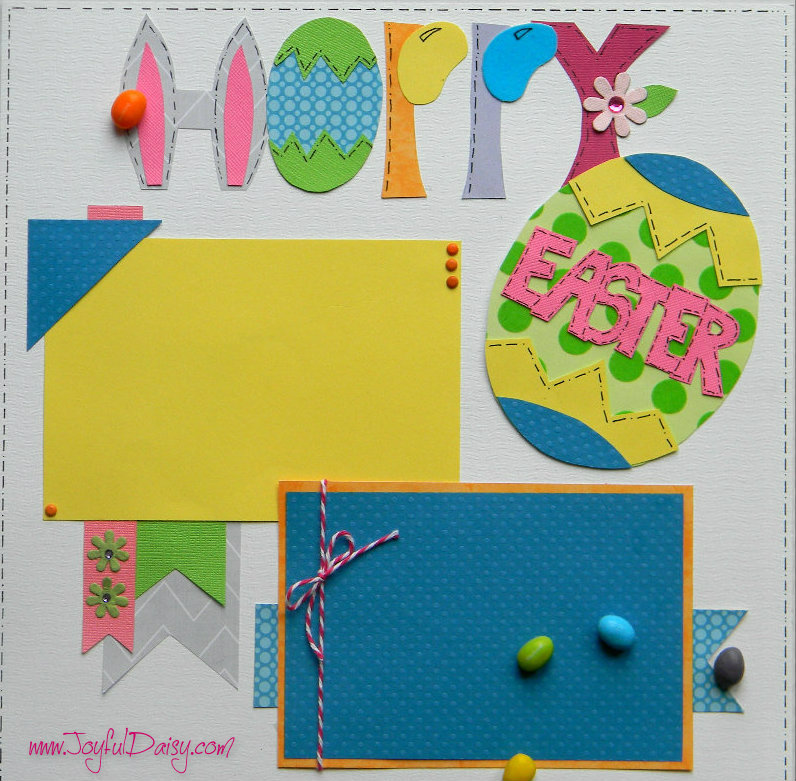
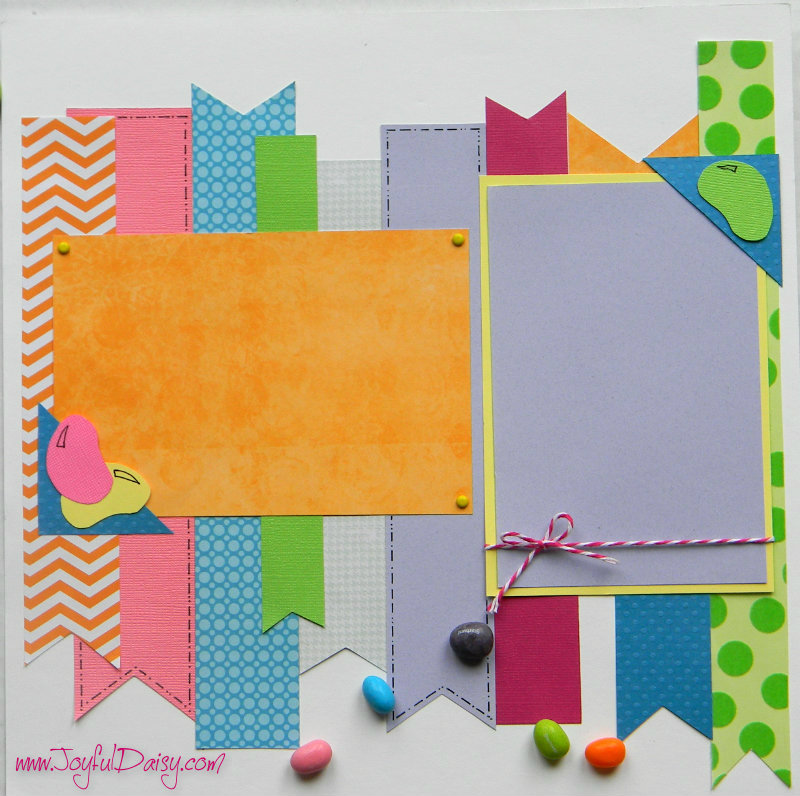
OK, start by laying out the title pieces about 1/4″ from the top edge.
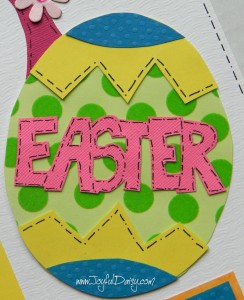 Assemble large egg with decorative pieces.
Cut out 2 mats 4 1/4″ * 6 1/4″.
Tape 2 pieces of bakery twine about 1/2″ in from one of the shorter sides of one mat and tie a nice little bow- you might need to borrow someone’s finger:)
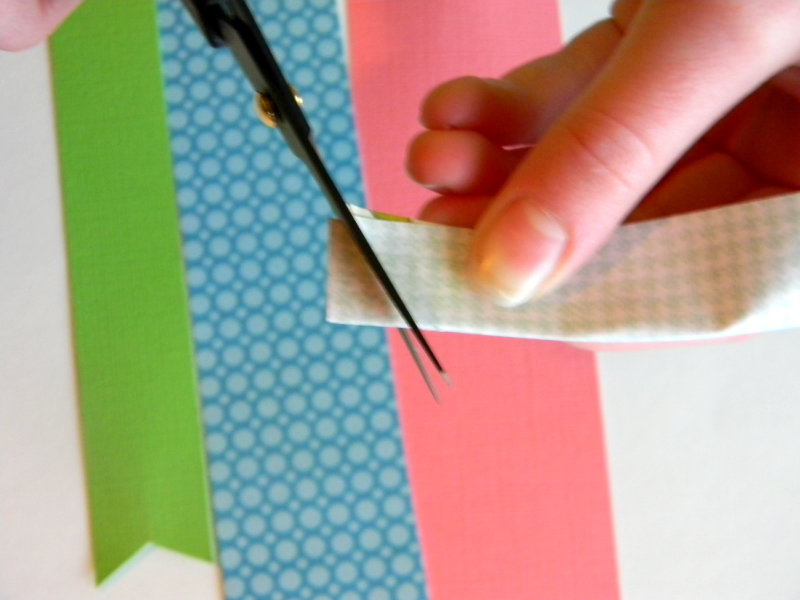
Cut an assortment of strips of paper from 1″ – 2″ wide in a variety of lengths. Cut little dove tails at the end of each strip. If your paper isn’t too thick you can gently fold each strip over meeting the sides and cutting from the corner angled up toward the fold. If your paper is too thick it may crease so you can eyeball it or make a pattern from scrap paper and then trace.
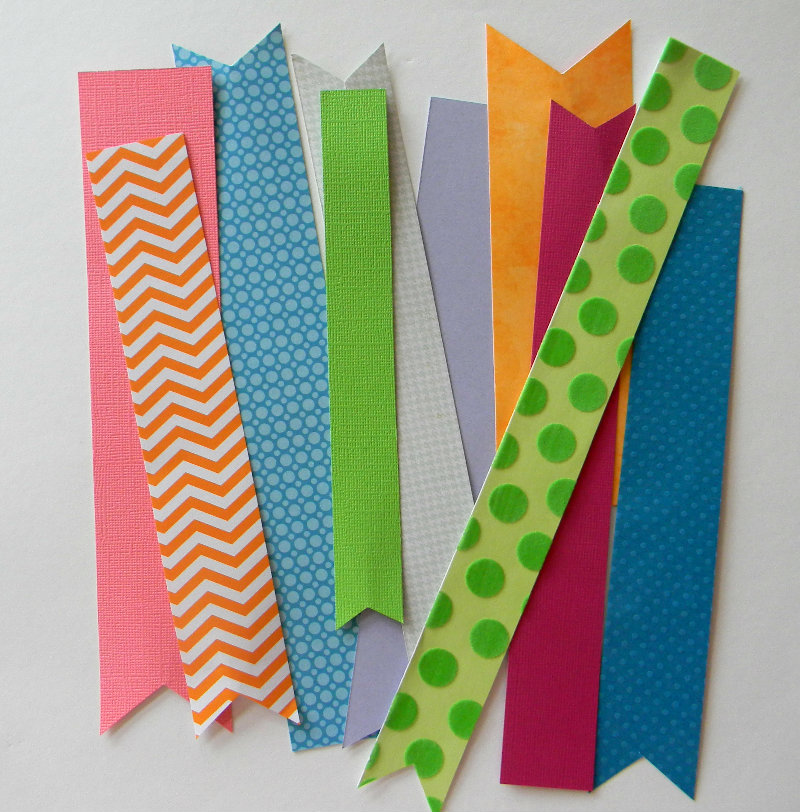
Start laying out some strips under your mats. If you want to know exactly what I used- the grey strip is 2″ * 6″, the green is 1 1/2″ * 5″, the pink is 1″ * 7″, and the blue is 1 1/2″ * 7″. Also cut a 2″ square from corner to corner to add to the top mat.
Finish page with flowers and mini brads. Then using a fine tip black pen, add faux stitching if you wish to the letters, egg, and page edges.
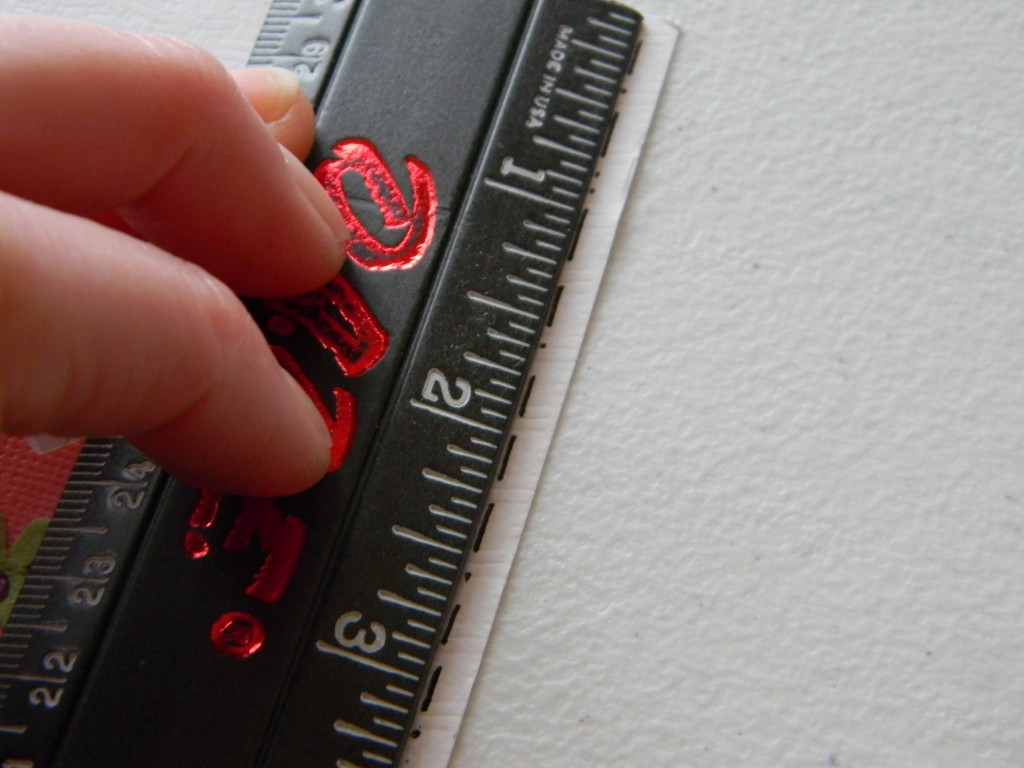
You can always use a ruler to make your faux stitches to help make sure they are straight.
NOW FOR PAGE 2…
Cut 2 more mats 4 1/4″ * 6 1/4″. Tape 2 pieces of bakery twine about 1/2″ in from one of the shorter sides of one mat and tie a nice little bow- again you might need to borrow someone’s finger:)
Start laying out assorted strips, starting 1/4″ from the left edge and continue to 1/4″ from the right edge.
Eat a couple jelly beans – HEHE to keep up your strength and finish strong:)
Cut another 2″ square corner to corner. Add frames and corners to page. Finish off with a few paper jelly beans, a few mini brads, and to tie the page two to page one add some faux stitches to a couple of the strips.
ENJOY more scrapbooking tutorials in CRAFTS at…https://joyfuldaisy.com/crafts-2/
ENJOY more scrapbooking ideas in GALLERIES at…https://joyfuldaisy.com/galleries-2/
Be sure to have yourself a beautiful HOPPY Easter:)
 ENJOY more scrapbooking tutorials in CRAFTS at…
https://joyfuldaisy.com/crafts-2/
ENJOY more scrapbooking ideas in GALLERIES at…
https://joyfuldaisy.com/galleries-2/
 If you enJOY what you see here, I can send you a little email memo when I add a new project to Joyful Daisy.
Just add your email at the top right column of this page and then be sure to click on our link in your confirmation email.
You can also stay connect to JD on pinterest, facebook, google+, and RSS. Just click buttons above our logo on the very top of this page.
Thanks for stopping by,
Cyber hugs,
Amy
SEE FUN LINK PARTY http://thenymelrosefamily.com/2014/03/whimsy-wednesdays-108.html
